*This post contains affiliate links.
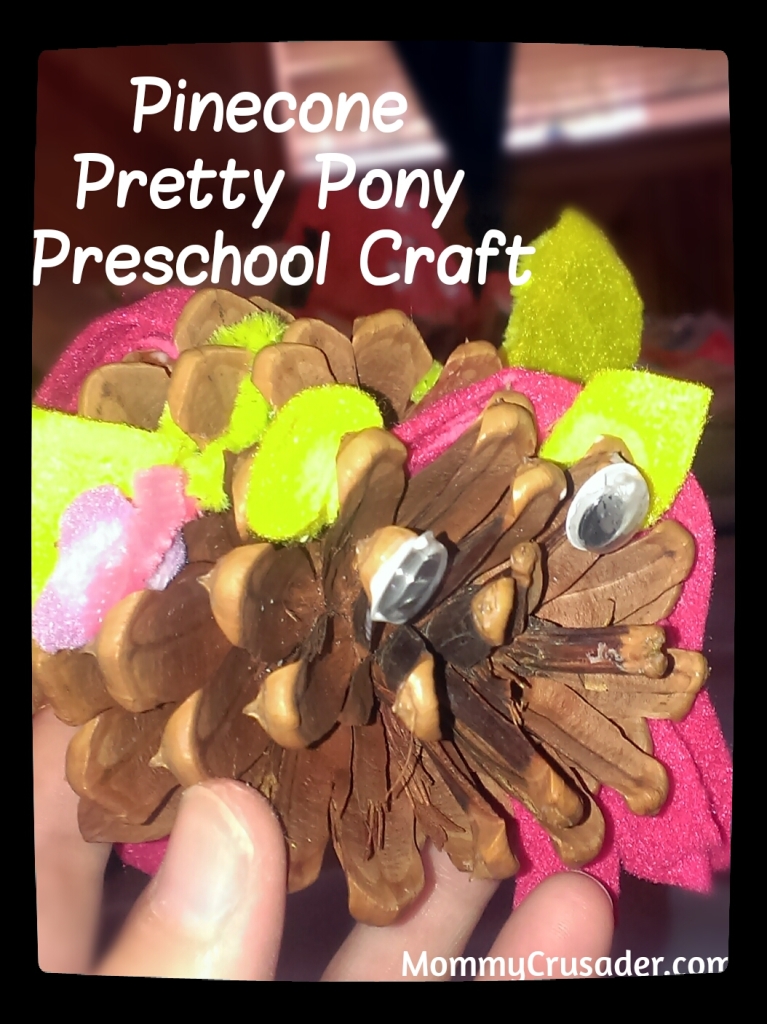
My preschooler loves My Little Ponies. In all honesty, so do my other children— but my preschooler really loves My Little Ponies. Her favorite pony is Fluttershy. I also really like the Fluttershy character from the show. We had been to the mountains and collected fabulous pinecones. I was going to turn them into some sort of Christmas item, but instead, I helped my preschooler turn them into a Pinecone Pretty Pony as a preschool craft.
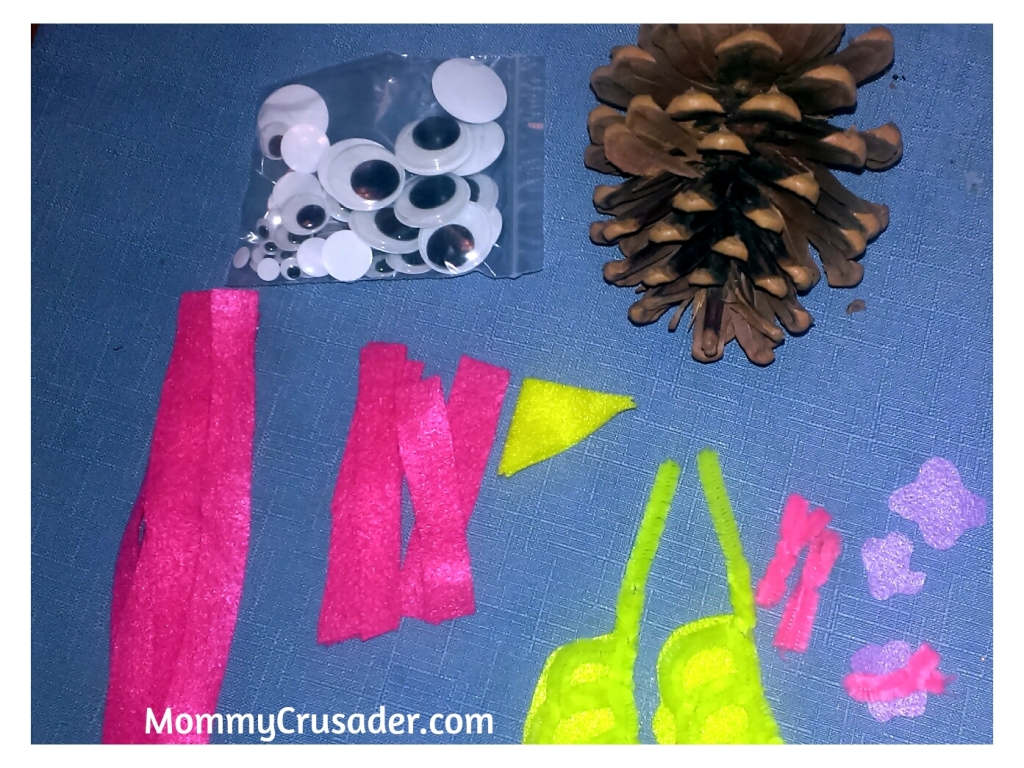
Supplies:
Fist sized pine cones
Felt squares
Elmer’s glue (liquid)
Pipe cleaners
Craft eyes
Scissors
How it’s done:
First, decide which Pretty Pony the child would like to create. We made a Fluttershy. We printed out a picture to use as a model.
Next, cut the felt into the accents for the pony. In our case, we cut yellow “wings”, purple butterflies for the cutie-mark, and hot pink strands for the mane and tail. To make the wings, I cut a three and then extended the top and bottom lines until they were about 1 ½ inches long. Then I finished them off by cutting a straight line to connect the top and bottom lines. The butterflies were cut following the same method, but instead of cutting the straight line, I cut a backwards three. This kept the two wings of the butterfly connected. The tail was cut in strips of felt about ¼ inch wide and 3 inches long, while the mane was cut in strips about ¼ inch wide and 2 inches long .
Next, shape the pipe cleaners for whatever support or accent may be needed. For example, we used yellow pipe cleaners to support Fluttershy’s wings. We shaped them to the outline of the cut felt. We also made the body of the butterflies with purple pipe cleaners. I let my preschooler glue the pipe cleaners to the felt pieces.

While we were waiting for those to dry, we worked on the tail. This was my preschooler’s favorite part of the activity. I made a pool of glue on a plate and let her dip the end of the tail into the glue, then stick the gluey end into pinecone. It works best to pile the strands on to each other, and then push them down in between the rows on the pinecone. We put all the tail strands in one pinecone segment.
Then we worked on the mane. The mane is made by repeating the process used with the tail, but make the stacks only three or four strands tall. Also, instead of placing all the strands in one pinecone segment, we tried to cascade the strands down one side of the pinecone.
Once the mane and tail are in place, the other items should be ready to glue onto the pinecone. We placed the wings on the back, and the cutie-marks on the side. Then we glued the craft eyes onto the front.
This was a fun and easy craft to do with my preschooler. She loved making and gluing the pieces on her very own Fluttershy. This activity worked on her fine motor skills in a fun and different way. She also enjoyed how the pinecone “held” the pieces in place a bit (because of the rough spikes.) The most fun for me was after the pinecone was dry. My preschooler played with her Fluttershy for most of the afternoon.