
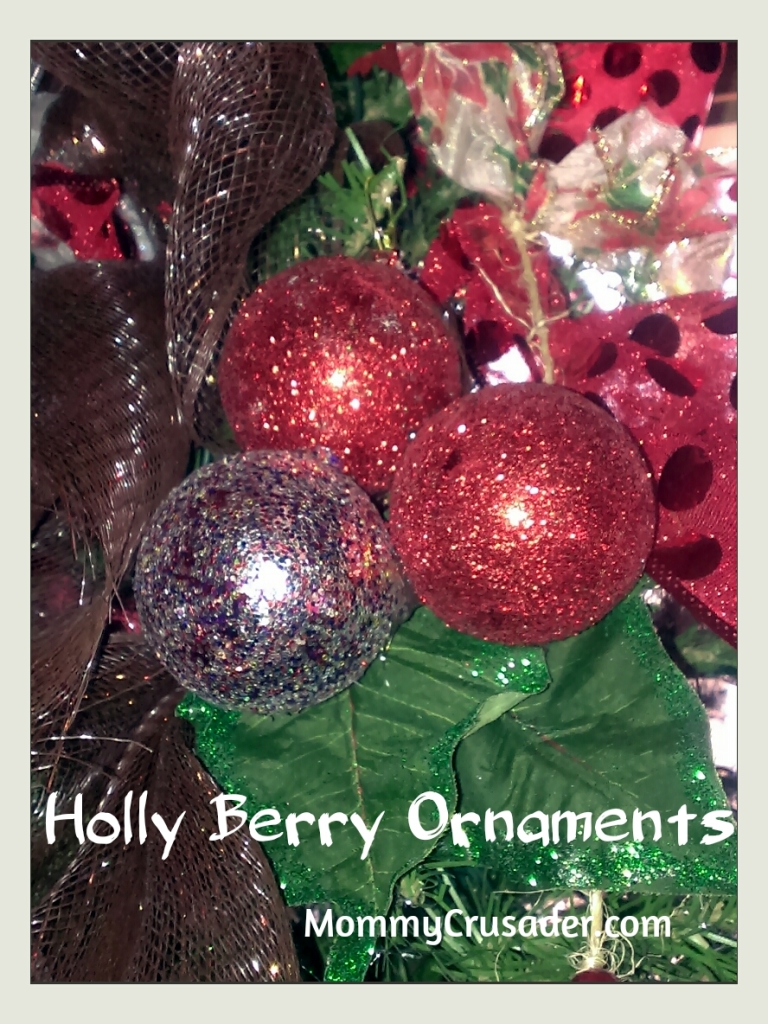
Our craft this week was the creation of holly berry ornaments. These ornaments are about 8 inches in width and stand out nicely on a green Christmas tree. They are covered in glitter and use old ball ornaments that need some sprucing up. We had a lot of fun making them together. Daddy said we had taken some of the ugliest ornaments he’d ever seen and made them into something beautiful. So, you could say it was a success. The process for creating these ornaments includes some drying time and the generous application of glitter. But once everything is put together, the holly berry ornaments look fabulous on the tree.
Supplies (for one ornament)
3 plastic ornament balls (red works best, although purple or white might also work)
2 large, fake, poinsettia leaves, green
Lots of red glitter (We went through two small bottles)
A good amount of green glitter. (We used half of a small bottle).
Craft or Elemer’s glue
Hot glue
Wire cutters
Sandpaper
Process
Start by placing the red glitter into a deep, washable bowl.
Then, snip off the ornament hangers from 2 of the ornaments.
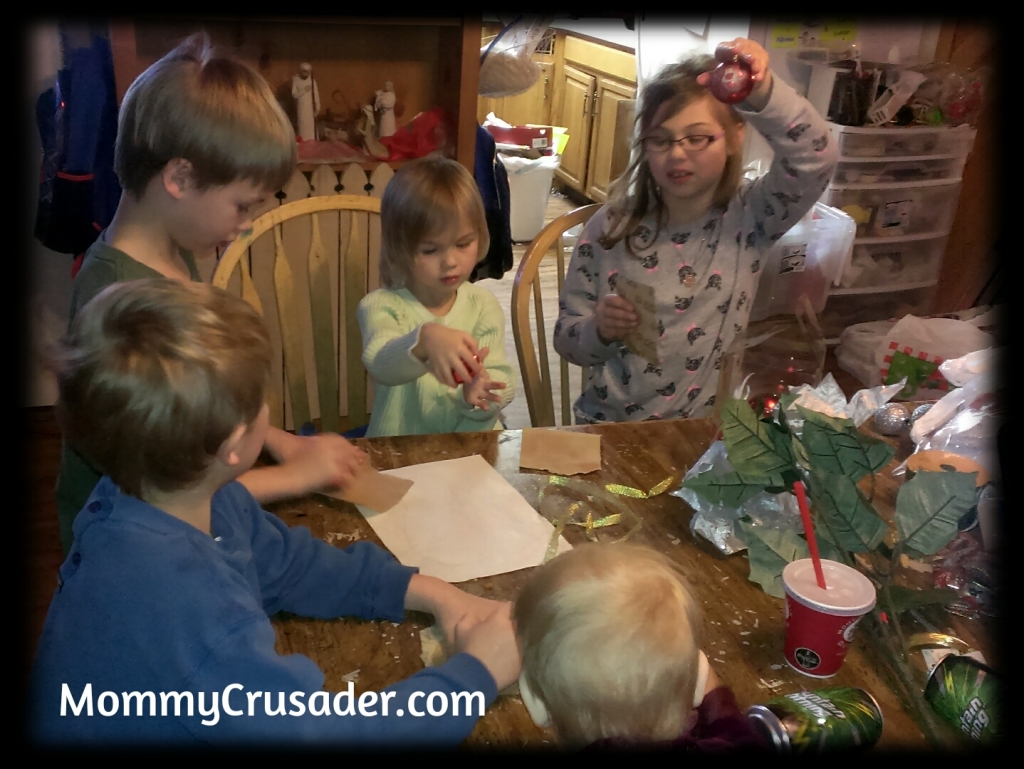
Next, sand down any designs on the ornaments. We used 100 grit sandpaper to remove some designs we didn’t want from the ornaments (I’m all about reusing).
Next, squeeze a fair amount of craft glue onto the sanded ornament. Spread the glue around until it covers the entire ornament.
Now, roll the ornament in the glitter until the ornament is completely and well coated. Set the ornament aside to dry on a sheet of paper or newsprint. Repeat the process with the other ornaments.
While waiting for the glue to dry, snip off two of the poinsettia leaves, making sure to leave as much of the leaf stem as possible.
Next, run a line of craft glue around the edges of the leaves, and then trace over the glue with a finger to smooth it onto the leaves more.
Now, sprinkle the green glitter onto the gluey edges until coated.
Set the leaves aside to dry.

Now, take the three glitter-encrusted ornament balls, and starting with the ornament ball that still has the ornament hanger attached, glue the balls together in a triangular shape using the hot glue. It’s better to apply a lot of hot glue so the balls will stick together. Also, when gluing the balls together, be mindful of where the ornament hanger is and how the ornament will hang from the tree.
Now, take the two glittery leaves and, using the hot glue, glue them together so that one is on top of the other and slightly twisted to one side. One leaf should be at the 6 o’clock position and the second leaf at the 5 or 7 o’clock position, depending upon personal preference.
Finally, place three large dots of hot glue on the back of the ornament balls and place them on the leaves so that the leaves are at the 5 or 7 o’clock position when holding the ornament up by its hanger. (Again depending on personal preference).
And ta-da, the holly berry ornaments are finished.
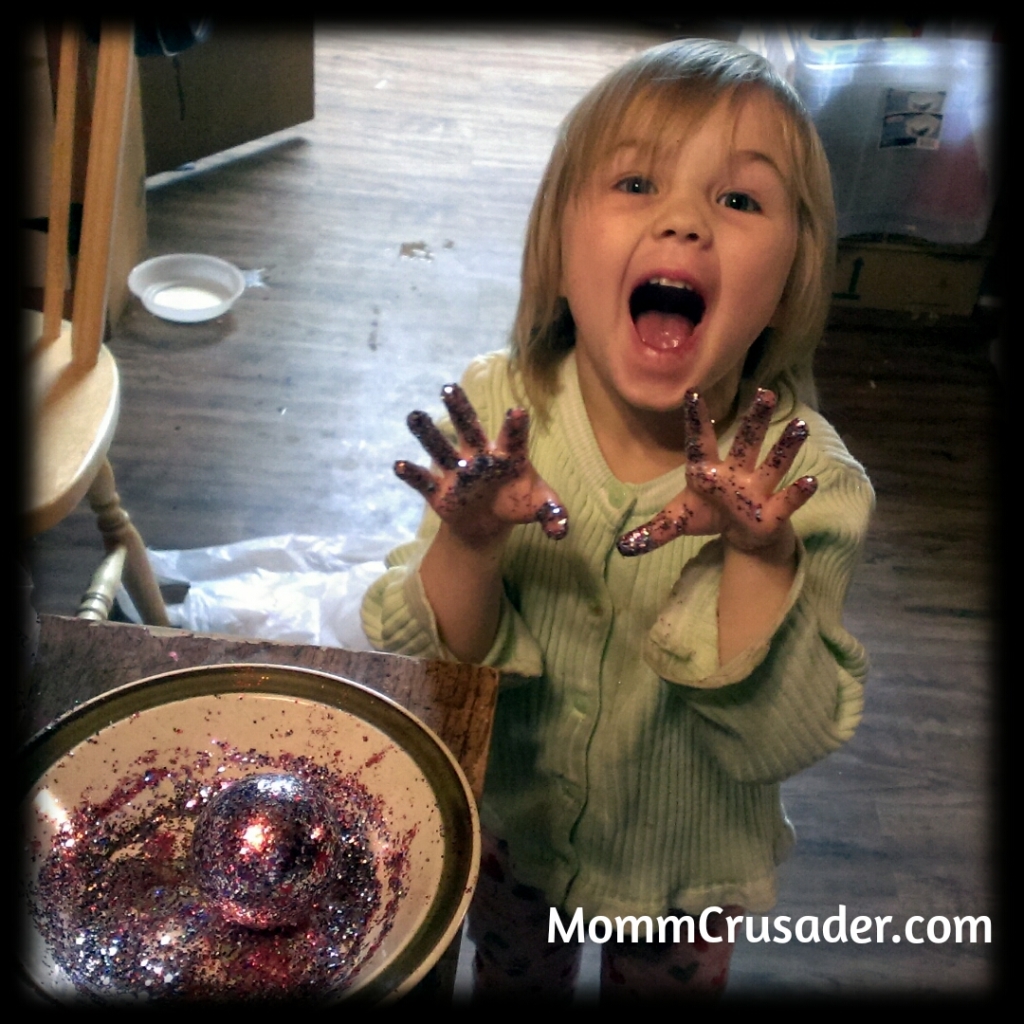
One word of caution, this craft uses a lot of glitter. Be prepared to find glitter in the strangest places for a few days, especially on any children who helped create the ornaments. I think we are still cleaning glitter up and it’s almost been a week since we made these. And as always, use caution with the hot glue gun and supervise young children closely while creating this craft.
My children had a lot of fun getting the ornaments coated in glue, and then coating the ornaments in the glitter. They also enjoyed sanding the ornaments. They had to be monitored while sanding because they had the tendency to sand in only once spot. We had to explain that the goal was to rough up the surface and remove the undesirable designs, not take the paint completely off the ornament. But, this was a fast and fun craft to build together.
Permalink
Those come out beautifully! And it looks like someone was having a lot of fun with the glitter! lol!
Permalink
It was a very fun craft and everyone enjoyed the glitter. I’m glad you liked them. Thanks for coming by and commenting. Sorry to be so long in replying. Hope you have a fabulous week.
Permalink
This is fabulous! I love it. Pinned and tweeted. Thanks for being a part of our party! I hope you stop by on Monday at 7 pm. We love to party with you. Merry Christmas! Lou Lou Girls
Permalink
Thanks for the social media love, wonderful ladies. I hope you had a Merry Christmas! Thanks for your party and for linking up with mine.