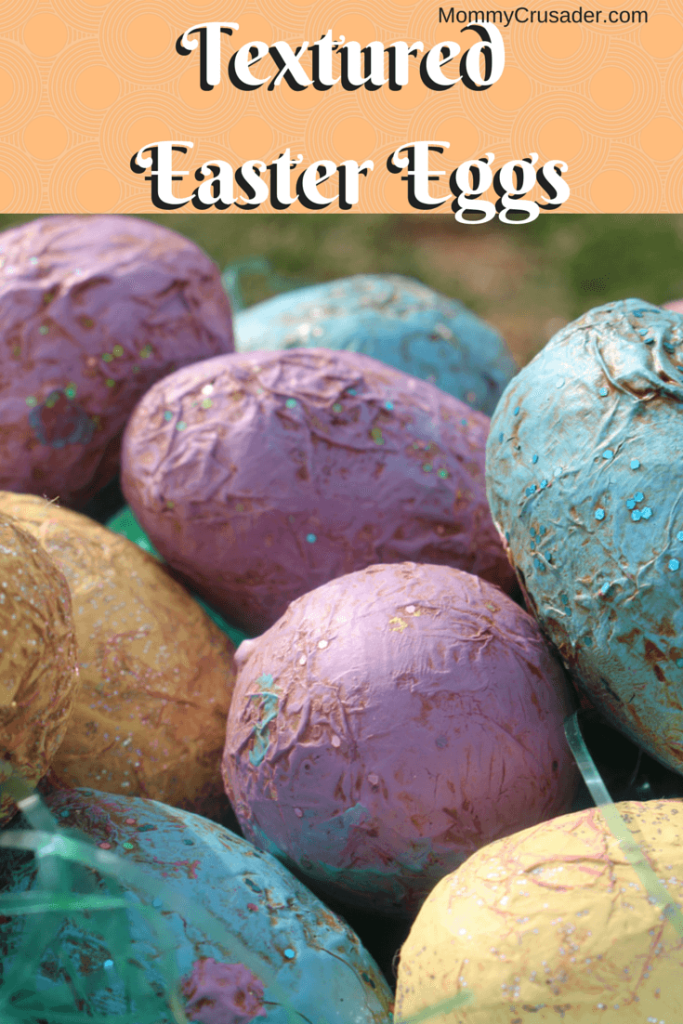
Here’s a fun Easter craft that the whole family can do! The results are fabulous Textured Easter Eggs! These will be a wonderful addition to your Easter decor for years to come. This is a wonderful family activity. It needs to be done in stages, so you can schedule several crafting sessions with this great activity.
This post contains affiliate links to help you easily get the products you need to complete the craft at no extra cost to you. See my full disclosure statement.
Materials
12 plastic Easter eggs
50 (approx.) 3 inches by 3 inches tissue paper squares
Mod Podge
Foam paint brush
Chalk paint – I suggest using three different spring colors.
Bristle paint brush
Clear wax
Dark wax
Wiping cloths (these will be thrown out later)
Preparing the eggs
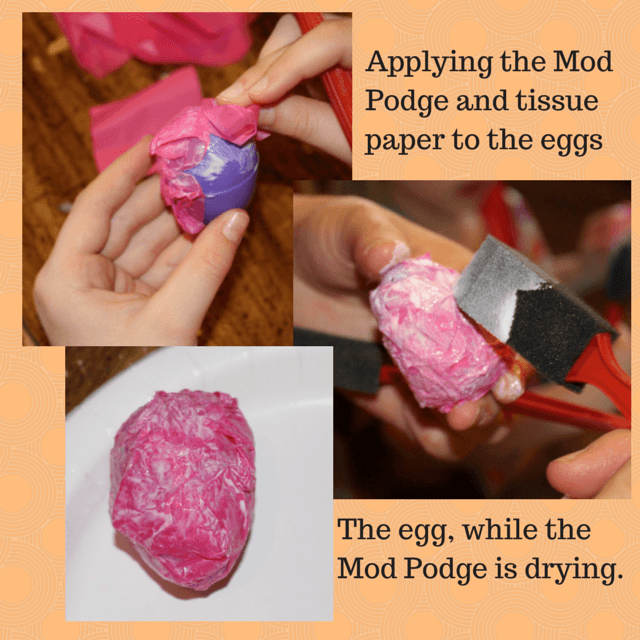
First, start by applying the Mod Podge to an area of the egg.
Next, crumpling the tissue paper slightly, place the tissue paper to the Mod Podge. Crumpling the tissue paper creates the texture for the chalk paint and waxes.
Repeat the first two steps until the entire surface of the egg is covered in crumpled tissue paper.
Finally, apply another coat of Mod Podge over the tissue-papered egg.
Allow the egg to dry for at least 2 hours.
Painting the eggs
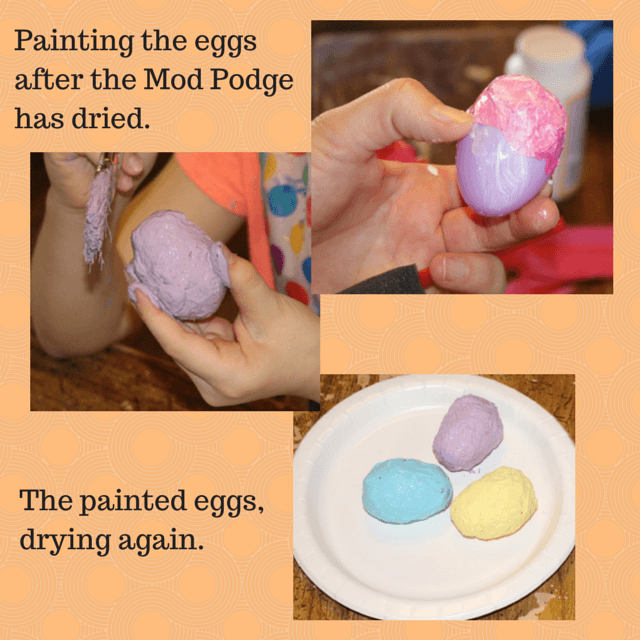
Using chalk paint and the bristle brush, apply an even coat of paint to the entire egg.
Chalk paint needs to be stirred vigorously before using, but can go onto any surface without sanding or prep-work. I used Americana Décor brand of chalk paint.
Allow the paint to dry.
Check for thin spots, and apply a second coat if needed.
Allow paint to dry completely – at least two hours
Finishing the Eggs
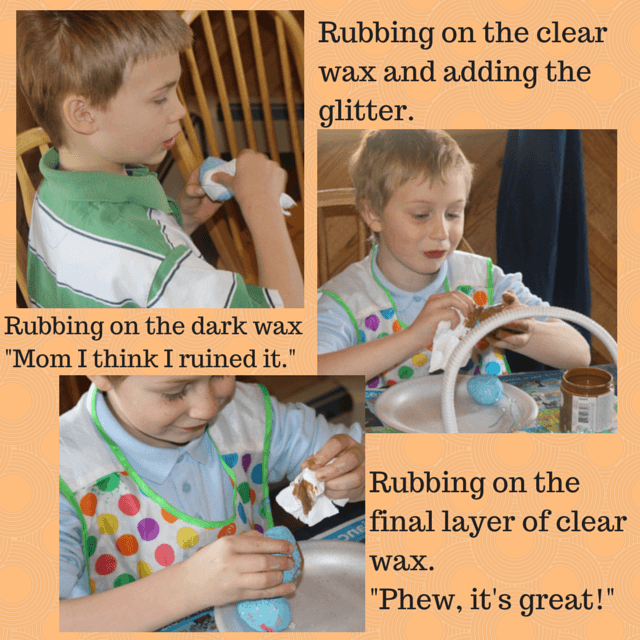
Using a wiping cloth, apply an even coat of clear wax to the egg. I used Americana Décor Crème brand of clear wax
Wipe off any excess wax.
Sprinkle with glitter at this point, if desired.
Now, using a separate wiping cloth, apply an even coat of dark wax to the egg. I used Americana Décor Crème brand of dark wax. You’ll think you’ve ruined the project at this point, but you haven’t, so don’t worry.
Now, using the wiping cloth used for the clear wax, apply a second coat of the clear wax. This will remove most of the dark wax, but will leave the dark wax in the crevices, creating the texture.
Voila! The egg is finished and ready to decorate with.
The layers of Mod Podge will help make the plastic egg a bit sturdier, but I still recommend storing it wrapped in tissue paper when the season is over. The layers of wax keep the paint from rubbing off and hold the sparkles in place. I made my eggs all mono-chromatic, however, if designs are desired, they can be added as another layer of chalk paint. Just use a fine bristle brush (like a water color brush) to paint the designs.
Also, my four older children participated in every step of this craft, and they loved it! However, when having children help, I recommend painting smocks for everyone. We also had our children paint the eggs in groups – meaning two children at a time, and each child using only one color of paint. This helped to keep the mess down to a manageable level.
This is a craft the whole family can help with and is a lot of fun to do. The finished eggs look like they’re made from painted antiqued wood, and are a fantastic addition to any Easter décor. Happy crafting!


Permalink
This looks so fun and I love how you can spread it out over several crafting times! Thanks!
Permalink
Simple and neat way of decorating eggs!
Permalink
Great idea Deborah! Thanks for sharing