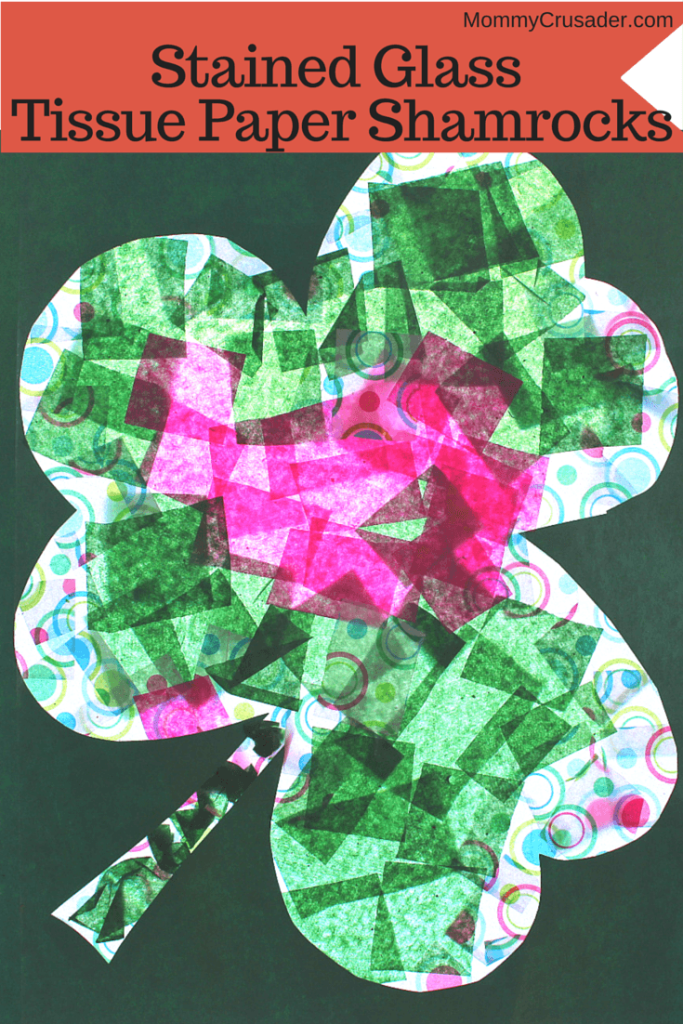
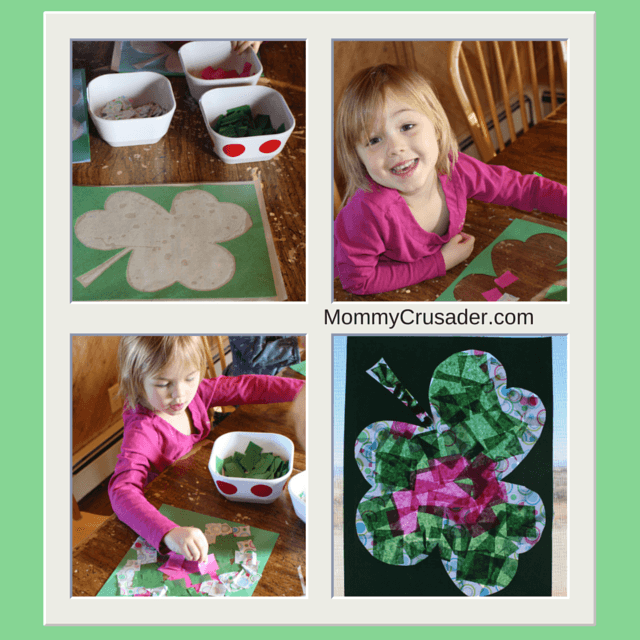
It’s almost St. Patrick’s Day, so it’s time to celebrate the Irish in everyone. My preschooler and her friends got together and made stained glass tissue paper shamrocks to celebrate. I learned about this craft from my son’s art teacher last year. This was a fun preschool craft that helps develop the fine motor skills in little hands. The activity takes a little bit of time to set up, but the creation is practically mess free. (Always a bonus.) We had a great time working on our shamrocks together, and made some really pretty St. Patrick’s Day window decorations.
Set Up
First, draw a large shamrock onto green card stock or construction paper. Then cut the shape out, but leave the frame of the shamrock intact. I kept the cut out shamrocks to be used in a different craft. This craft will use the frame with the shamrock shape cut from it.
Now, measure and cut clear contact paper so that it’s the size of the construction paper frame. Be sure, as the contact paper is being separated from its backing, to save the paper backing. Apply the contact paper to the paper frame, making sure the missing shamrock shape is completely covered. Re-adhere the contact paper to the sticky side of the construction paper to keep the contact paper clean, until it’s time to create the craft.
Finally, cut ½ inch by ½ inch squares from tissue paper. I used some green tissue paper, pink tissue paper, and festive circle tissue paper, but any type of tissue paper works. Keep the colors separate so that it is easier for little hands to choose.
Create
Once the materials are prepared, it is time to create the stained glass tissue paper shamrocks. The creation process is really easy, and really good for developing fine motor skills.
Simply pull off the contact paper backing, and place the squares of tissue paper where the contact paper is sticky (inside the cutout of the shamrock). The goal is to cover all the contact paper so no sticky part is left. And the effect is enhanced if a little layering happens.
I let the children design with the tissue placement and create unique looks. My preschooler really loves pink, so I asked her to use at least as much green and circle colored papers as pink. It was fun watching them create their “masterpieces”. I also really liked that there wasn’t any glue to get spilled (or eaten – as in the case of my toddler). The craft was simple enough for young three year olds to do successfully. And all I had to clean up were the contact paper backings. (I kept the tissue papers to use on something else.)
Display
The shamrocks look really good once the tissue paper has been placed inside of them. But for the full effect of their appearance to be visible, they need to be hung in a sunny window. With the light coming through the design, the stained glass look is really emphasized. We have our shamrocks displayed in our front window, and they are really pretty to watch throughout the day as the sun light changes.
This craft was a fun way to bring a bit of the Luck o’ the Irish into our home this spring.


Permalink
Beautiful Deborah! Thanks for sharing..
Permalink
Thank you! I’m glad you liked them.
Permalink
This is such a fun idea, I know my daughter will love making these!
Permalink
I hope she has fun. Thanks for the visit.
Permalink
This looks so fun! I have all the supplies and can’t wait to have my girls do this. It will keep them busy at the table while I’m cooking dinner. =)
Permalink
I hope they have a great time and you have an easy time with dinner. Thanks for the comment.
Permalink
We did hearts in nursery for the kiddos to give their parents Valentines. So cute and works really well with the little ones because there is no messy glue. There are so many great shapes and themes that would work this could be done often and never get tiring.
Permalink
Thanks, my friend, that is a fabulous idea! Thanks for coming by and commenting. See you soon, I hope.